Wine label: How to define the right size?

How many times have you already thought about the design of a wine label and you don’t know where to start to define the size? After all, designing a label is like designing a bespoke suit. In both cases, it is important to define the right size. In this short tutorial, we will help you define the size of the label in 4 simple steps. Do not worry! It only takes a few simple steps to get the perfect size for your wine labels. Let’s begin!
Tools of the trade
To accomplish this difficult task, you will need some essential tools. First of all, you will need a flexible ruler, your faithful ally in defining the size of a wine label. You will see that you will live without it anymore.

So of course you will need the wine bottle you need to dress up. Always keep it by your side both for the preliminary phase of defining the size of your label and for testing. Graph paper or plain paper if you don’t have it handy.
Pen or pencil, faithful companion of the designer to “draw” the first drafts. Obviously, the scissors to cut out the final “mockup” of the wine label. To get a professional proof or mockup, ask for our help. Now that you have everything you need, we’ll show you 4 simple steps to get the perfect size for your wine label. Let’s see them in detail.
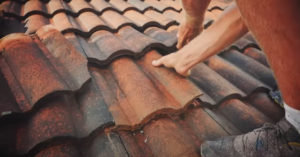
1. Measurement phase of the wine bottle
To design the perfect size for a wine bottle, you must first define the maximum size that the label can have depending on the shape of the bottle.
It is important to use a flexible ruler to measure the maximum width of the label.
For example, if you are thinking of a wrap-around label for wine, that is a label that almost completely envelops the surface of the bottle, always remember to reduce the width by a few millimeters compared to the diameter of the bottle if you do not want the label to overlap. to itself.
Another very important element to consider is the shape of the bottle. In fact, if the bottle has a body that tightens towards the bottom, it is essential to define the dimensions of the wine label in order to create a truncated cone shape and therefore the lower base slightly narrower.
2. Define the shape of the wine label

Once the overall dimensions of the wine label have been defined, it will be time to draw the die-cut trace of the label. The die-cut path determines the perimeter of the wine label on which the cut will be made during the production phase. To do this, use graph paper on which you will draw a rectangle with the maximum dimensions measured earlier.
If the wine label you have imagined has a rectangular shape, your job is already done. Conversely, if you have imagined a custom shape for the wine label, you can use this path to draw the correct shape. The chart sheet will be a great base to follow even if you need to draw curved shapes.
3. Cut the wine label
Is the die track ready? All you have to do is cut the label obtained from the previous steps. The countdown has begun and it’s time to try the wine label on the bottle. This test allows you to make some changes to the size of the wine label or to make it perfect. Are you still not perfectly satisfied?
No problem. Wrap or label the bottle and wipe off the excess as many times as you want. The flexible ruler will help you reduce the size of the wine label by a few millimeters to do a perfect job.
4. Measure the final size

The final step is to measure the result. Spread the label on a flat surface and measure the base and height of the label. Voila … That’s it!
In these simple steps, you can thus define once and for all the size of a wine label. Quick and easy, right? If you have any doubts or need technical help to define the measures or otherwise, contact us via this form and one of our experts will be happy to provide you with his support.
Another article on this blog that may interest you:
Wine label: What are the ways to embellish your project?